W-Sensor installation quick start
Download PDFThis guide takes a fresh W-Sensor from its box to a live, reporting installation in roughly half an hour. Have the following ready before you begin.
What you need
- W-Sensor with charged batteries (three CR123A cells) and the matching mount or adapter for the meter you will instrument.
- Waltero Setup app installed on your phone (iOS App Store or Google Play).
- Mimir account credentials — email and password for the same organization the sensor will be paired into.
- Access to the meter — register cover removable, digits clean enough to read.
- A thin pointed tool (small flat-head screwdriver) for the recessed config and trigger buttons.
- APN credentials if your cellular carrier requires them, or the local Wi-Fi SSID and password if the install will run over Wi-Fi.
Tip. First install on a new site? Bring a second sensor as a spare. Connectivity varies room-to-room and the easiest fix for a stubborn install is to swap and re-test.
Workflow at a glance
- Mount the adapter on the meter (1 minute).
- Pair the sensor in the Setup app and confirm the reading (5–10 minutes).
- Verify in Mimir that the device is online and reporting (2 minutes).
- Set up a low-battery alarm so you hear about the next service before it becomes urgent (2 minutes).
The rest of the time goes to network registration and the first cloud sync — mostly waiting.
Step 1 — Mount and align
Open the meter’s register cover and fit the Waltero mount on top. The mount snaps over the register; rotate it so the sensor’s camera will look straight down at the digits when seated. A misaligned mount is the single most common cause of failed digit reads later.
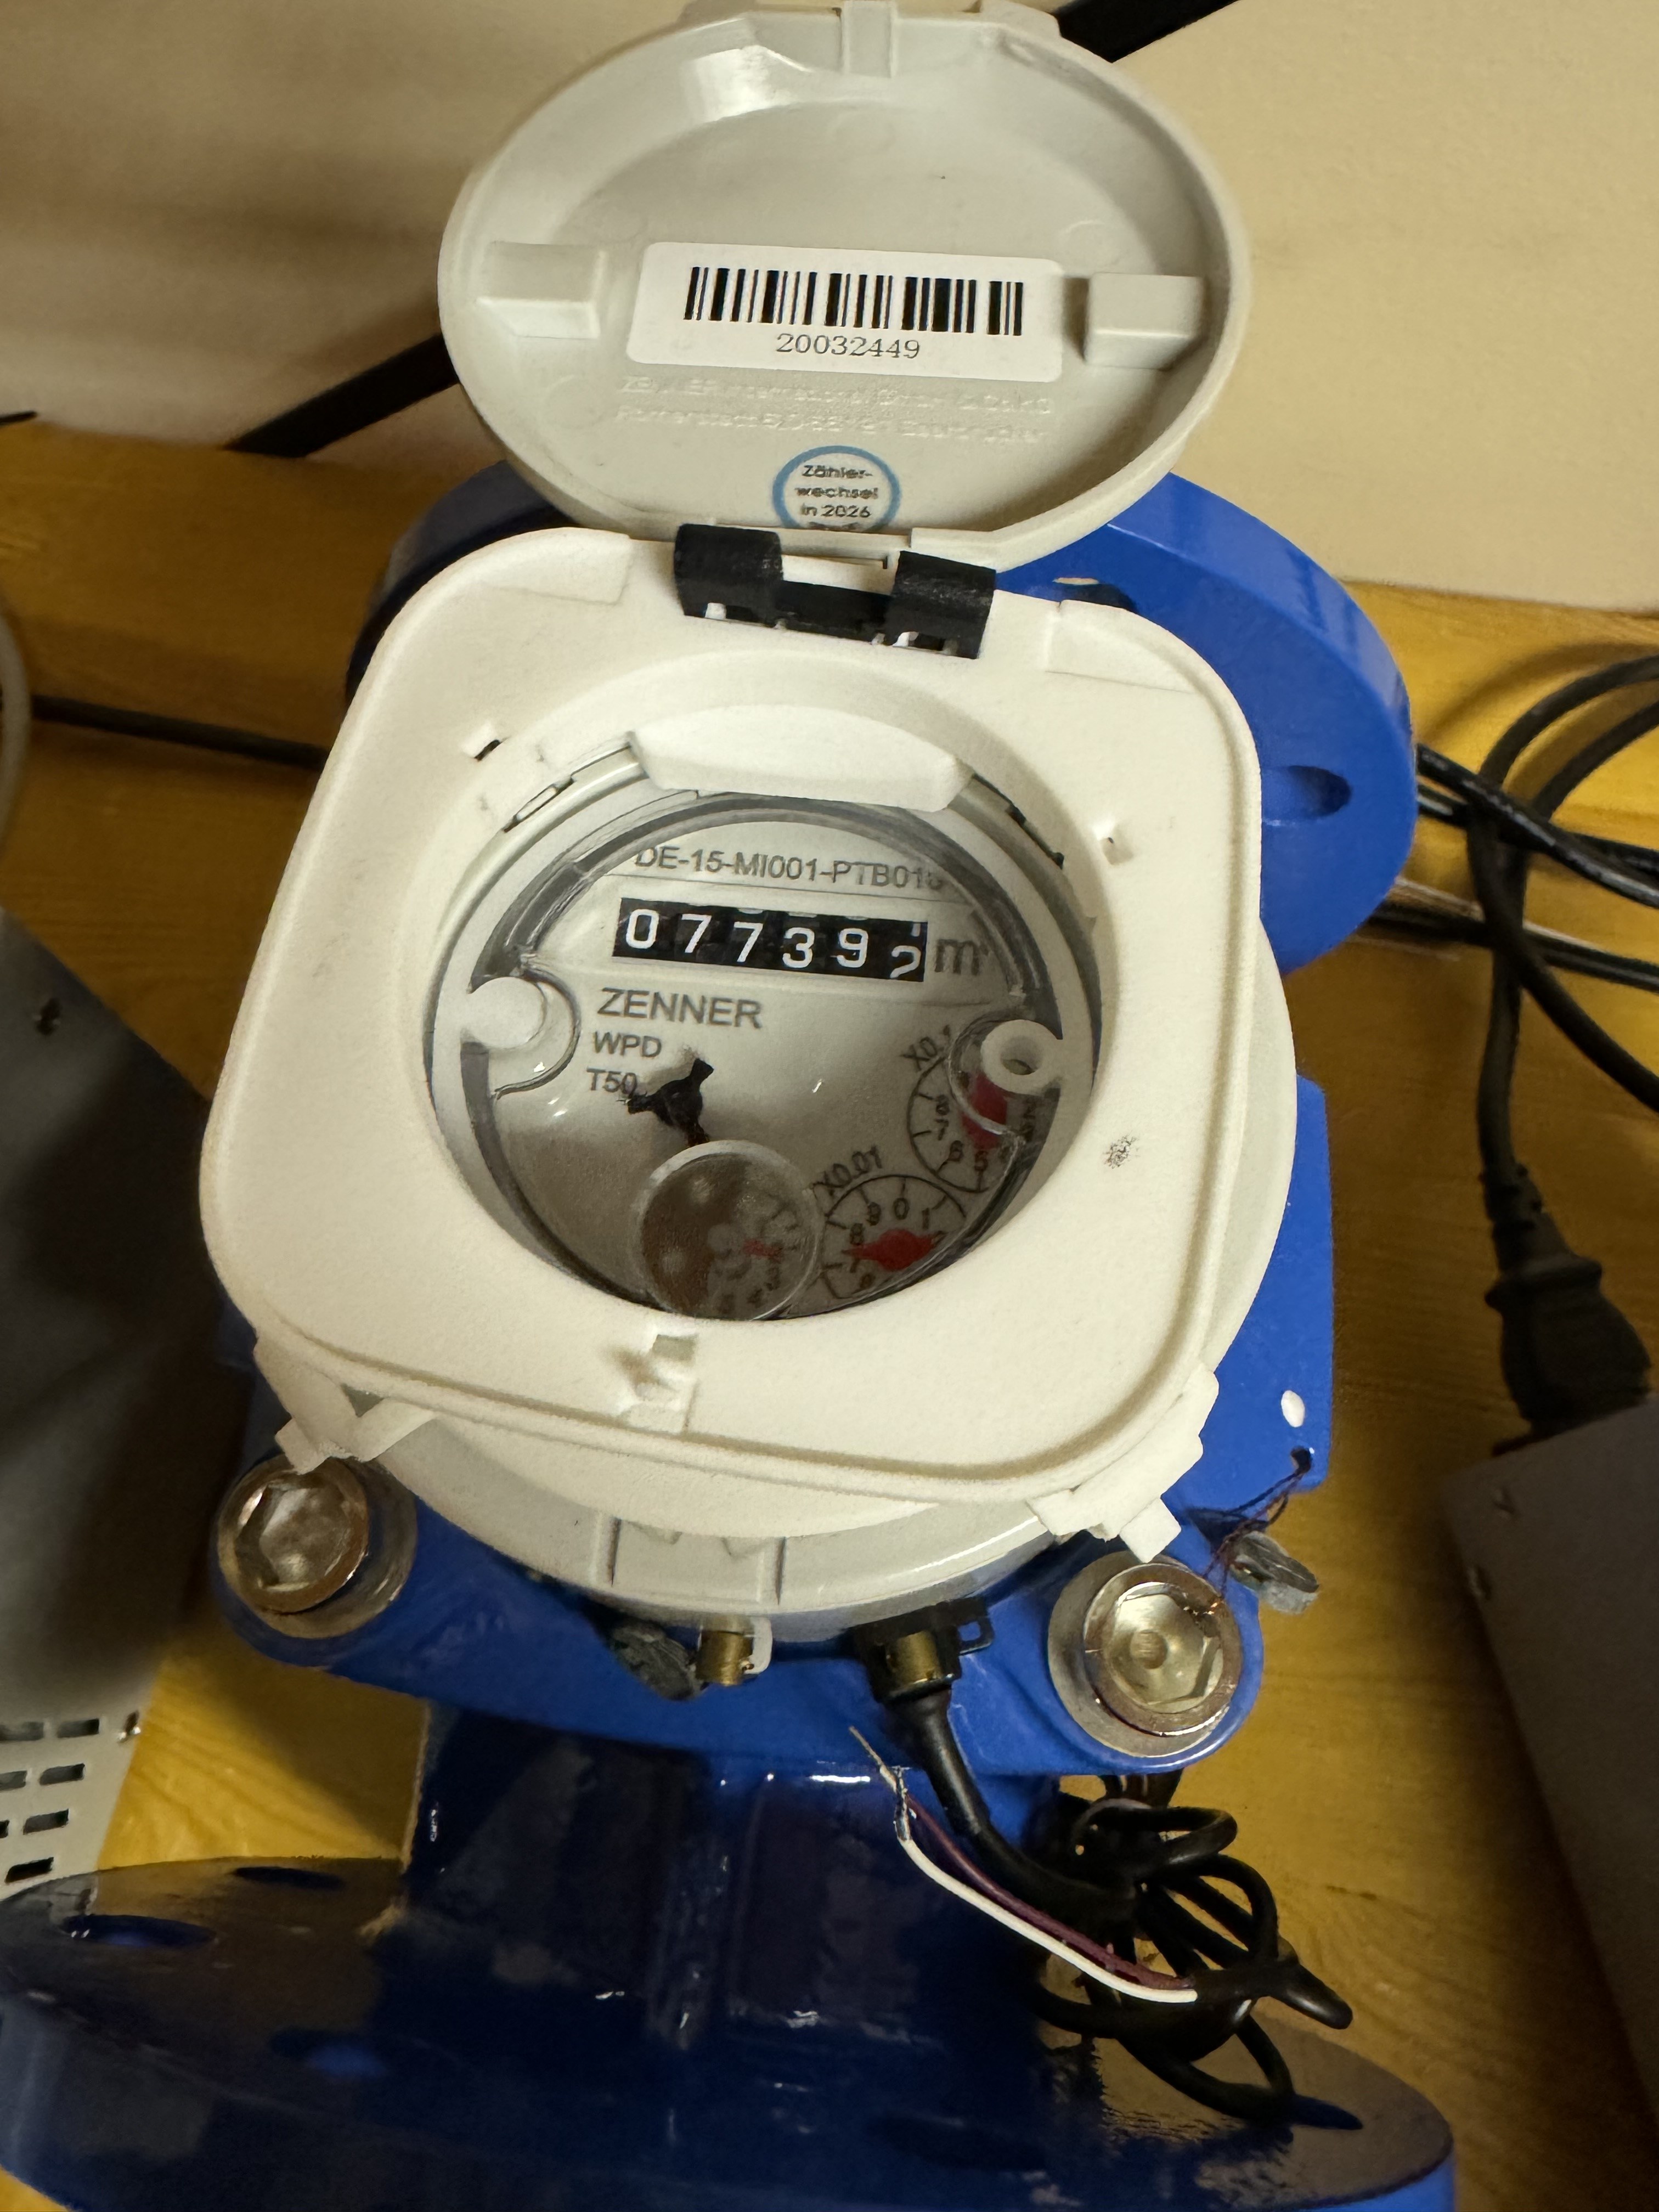
Place the W-Sensor on the mount and rotate it so the Waltero logo on the lid points the same direction as the digits below. Press the sensor down firmly so it seats on the mount.
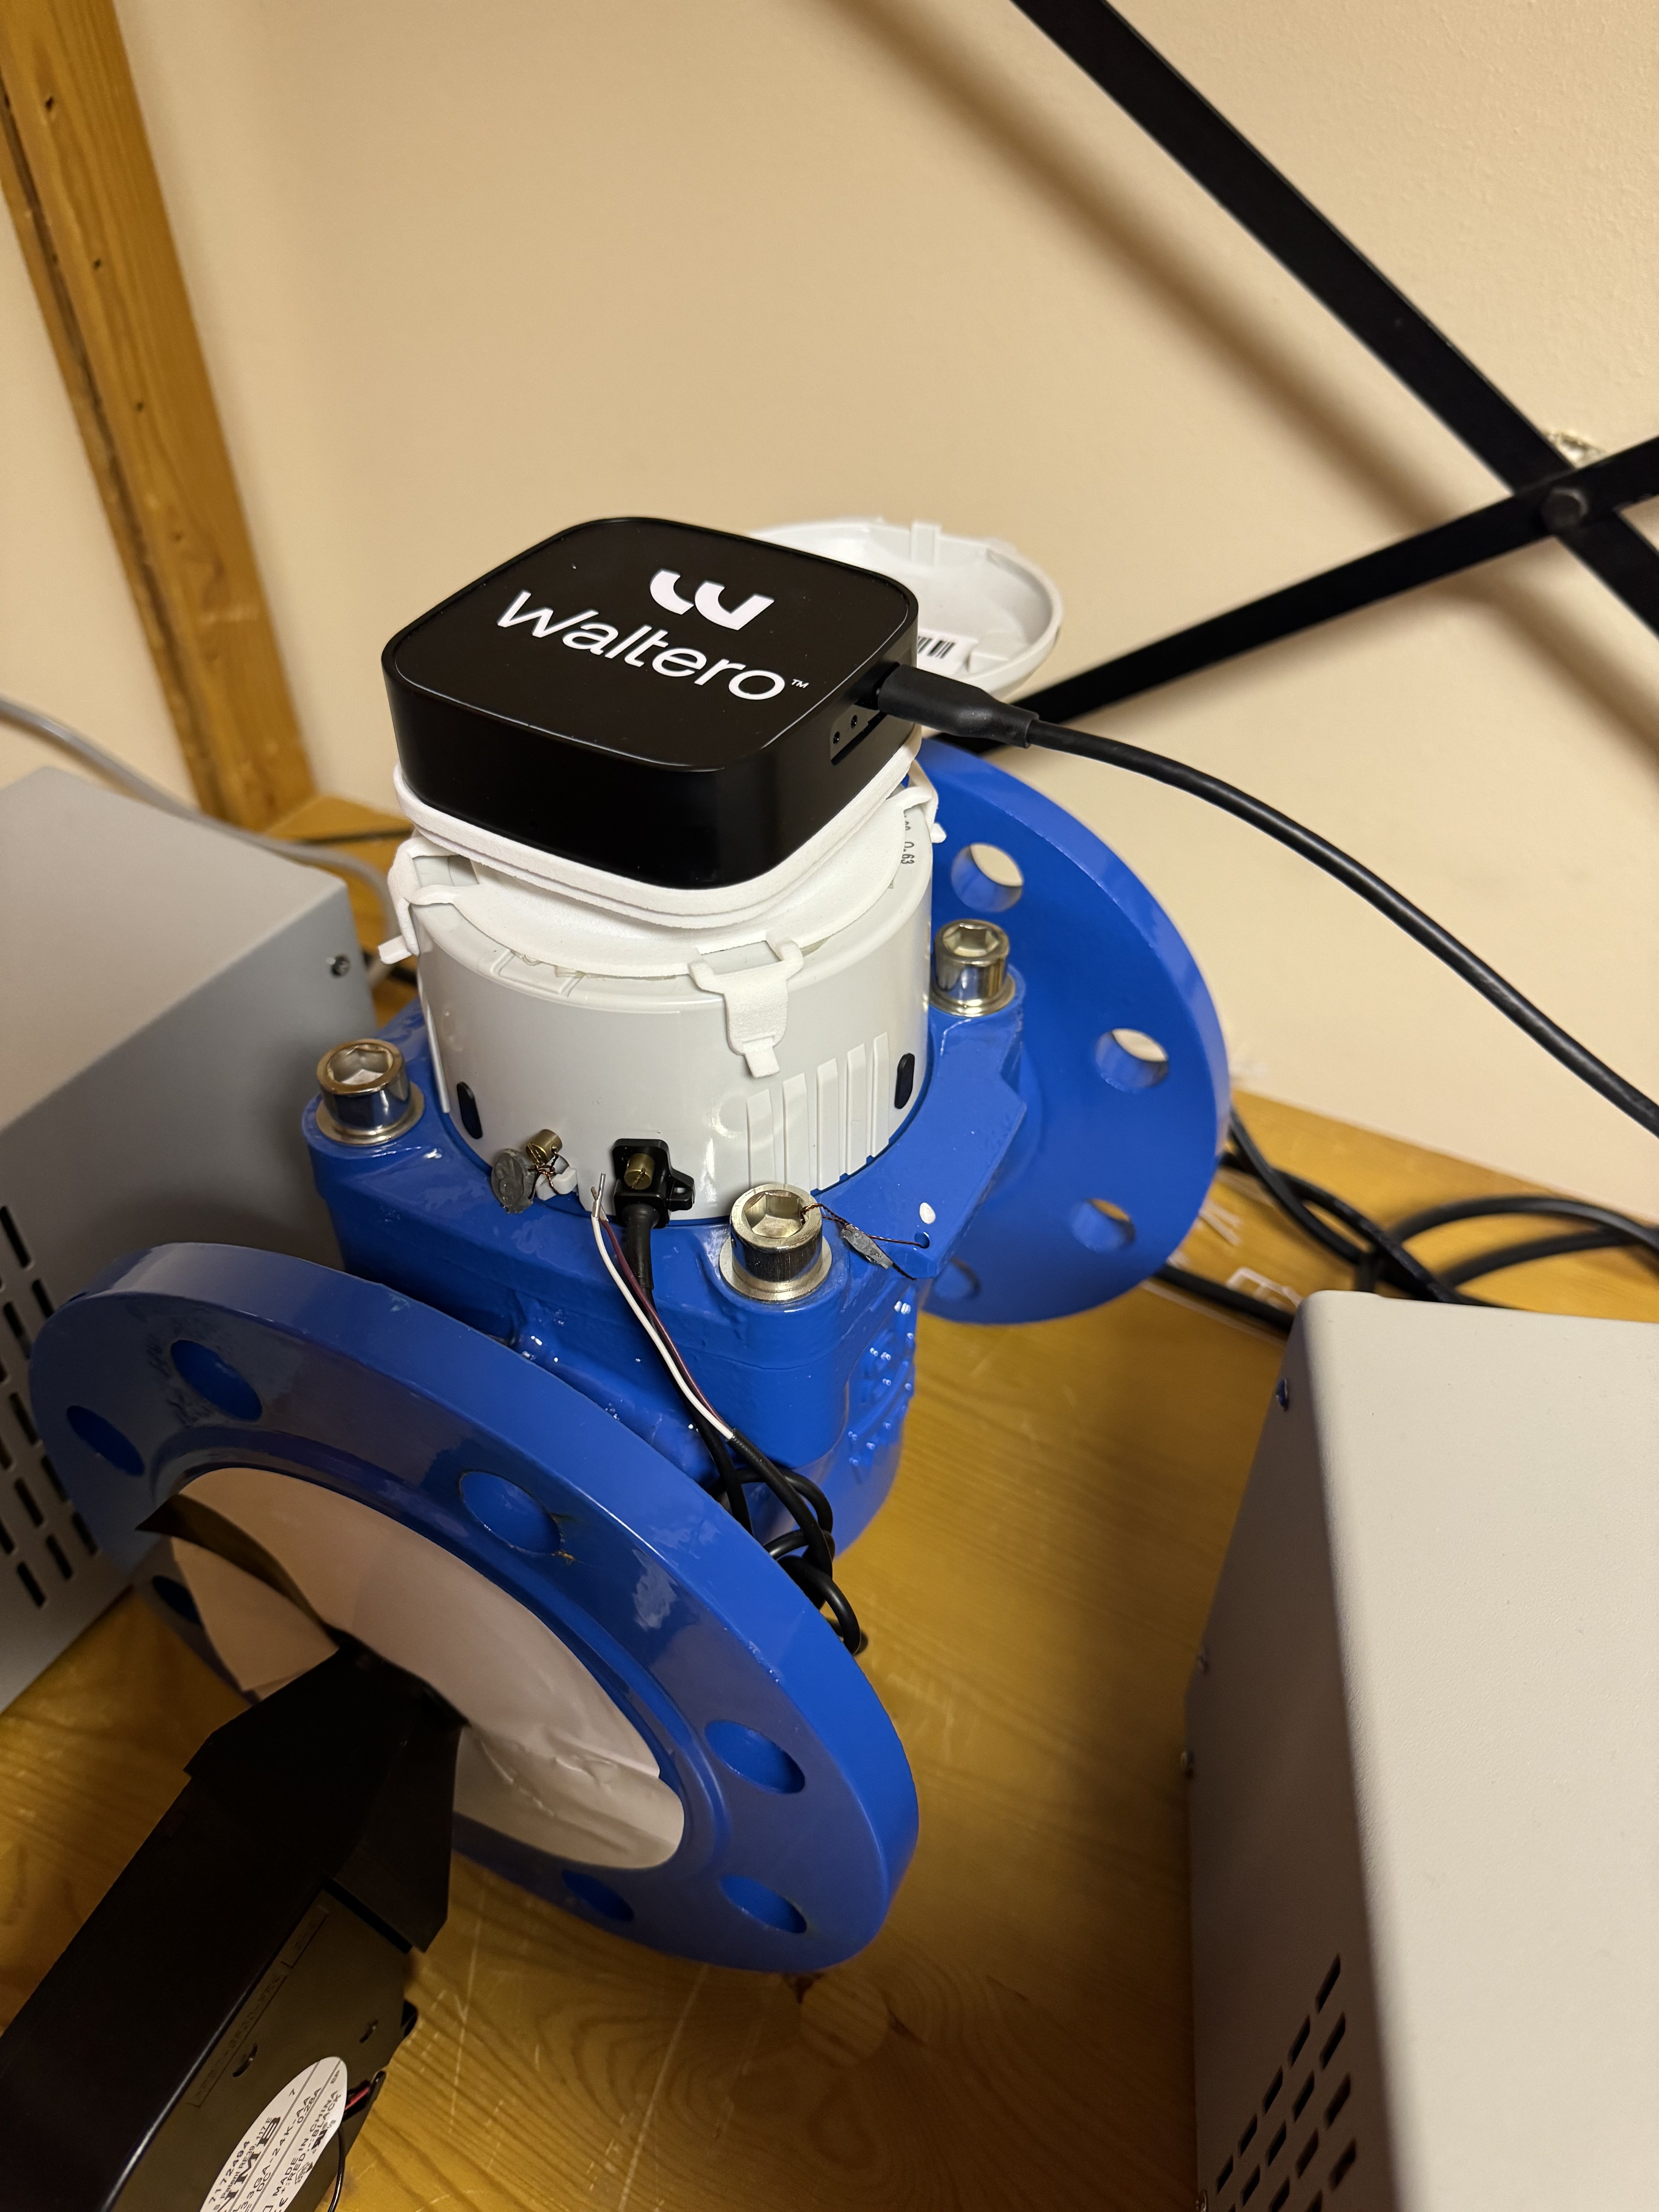
The logo orientation is what tells the camera which way is “up.” Get it wrong and the reading will not parse.
Step 2 — Pair with the Setup app
Wake the sensor
The config and trigger buttons are recessed in the side of the sensor — use the thin tool. To put the sensor into setup mode:
- Press and hold config.
- While still holding config, briefly press and release trigger.
- Release config.
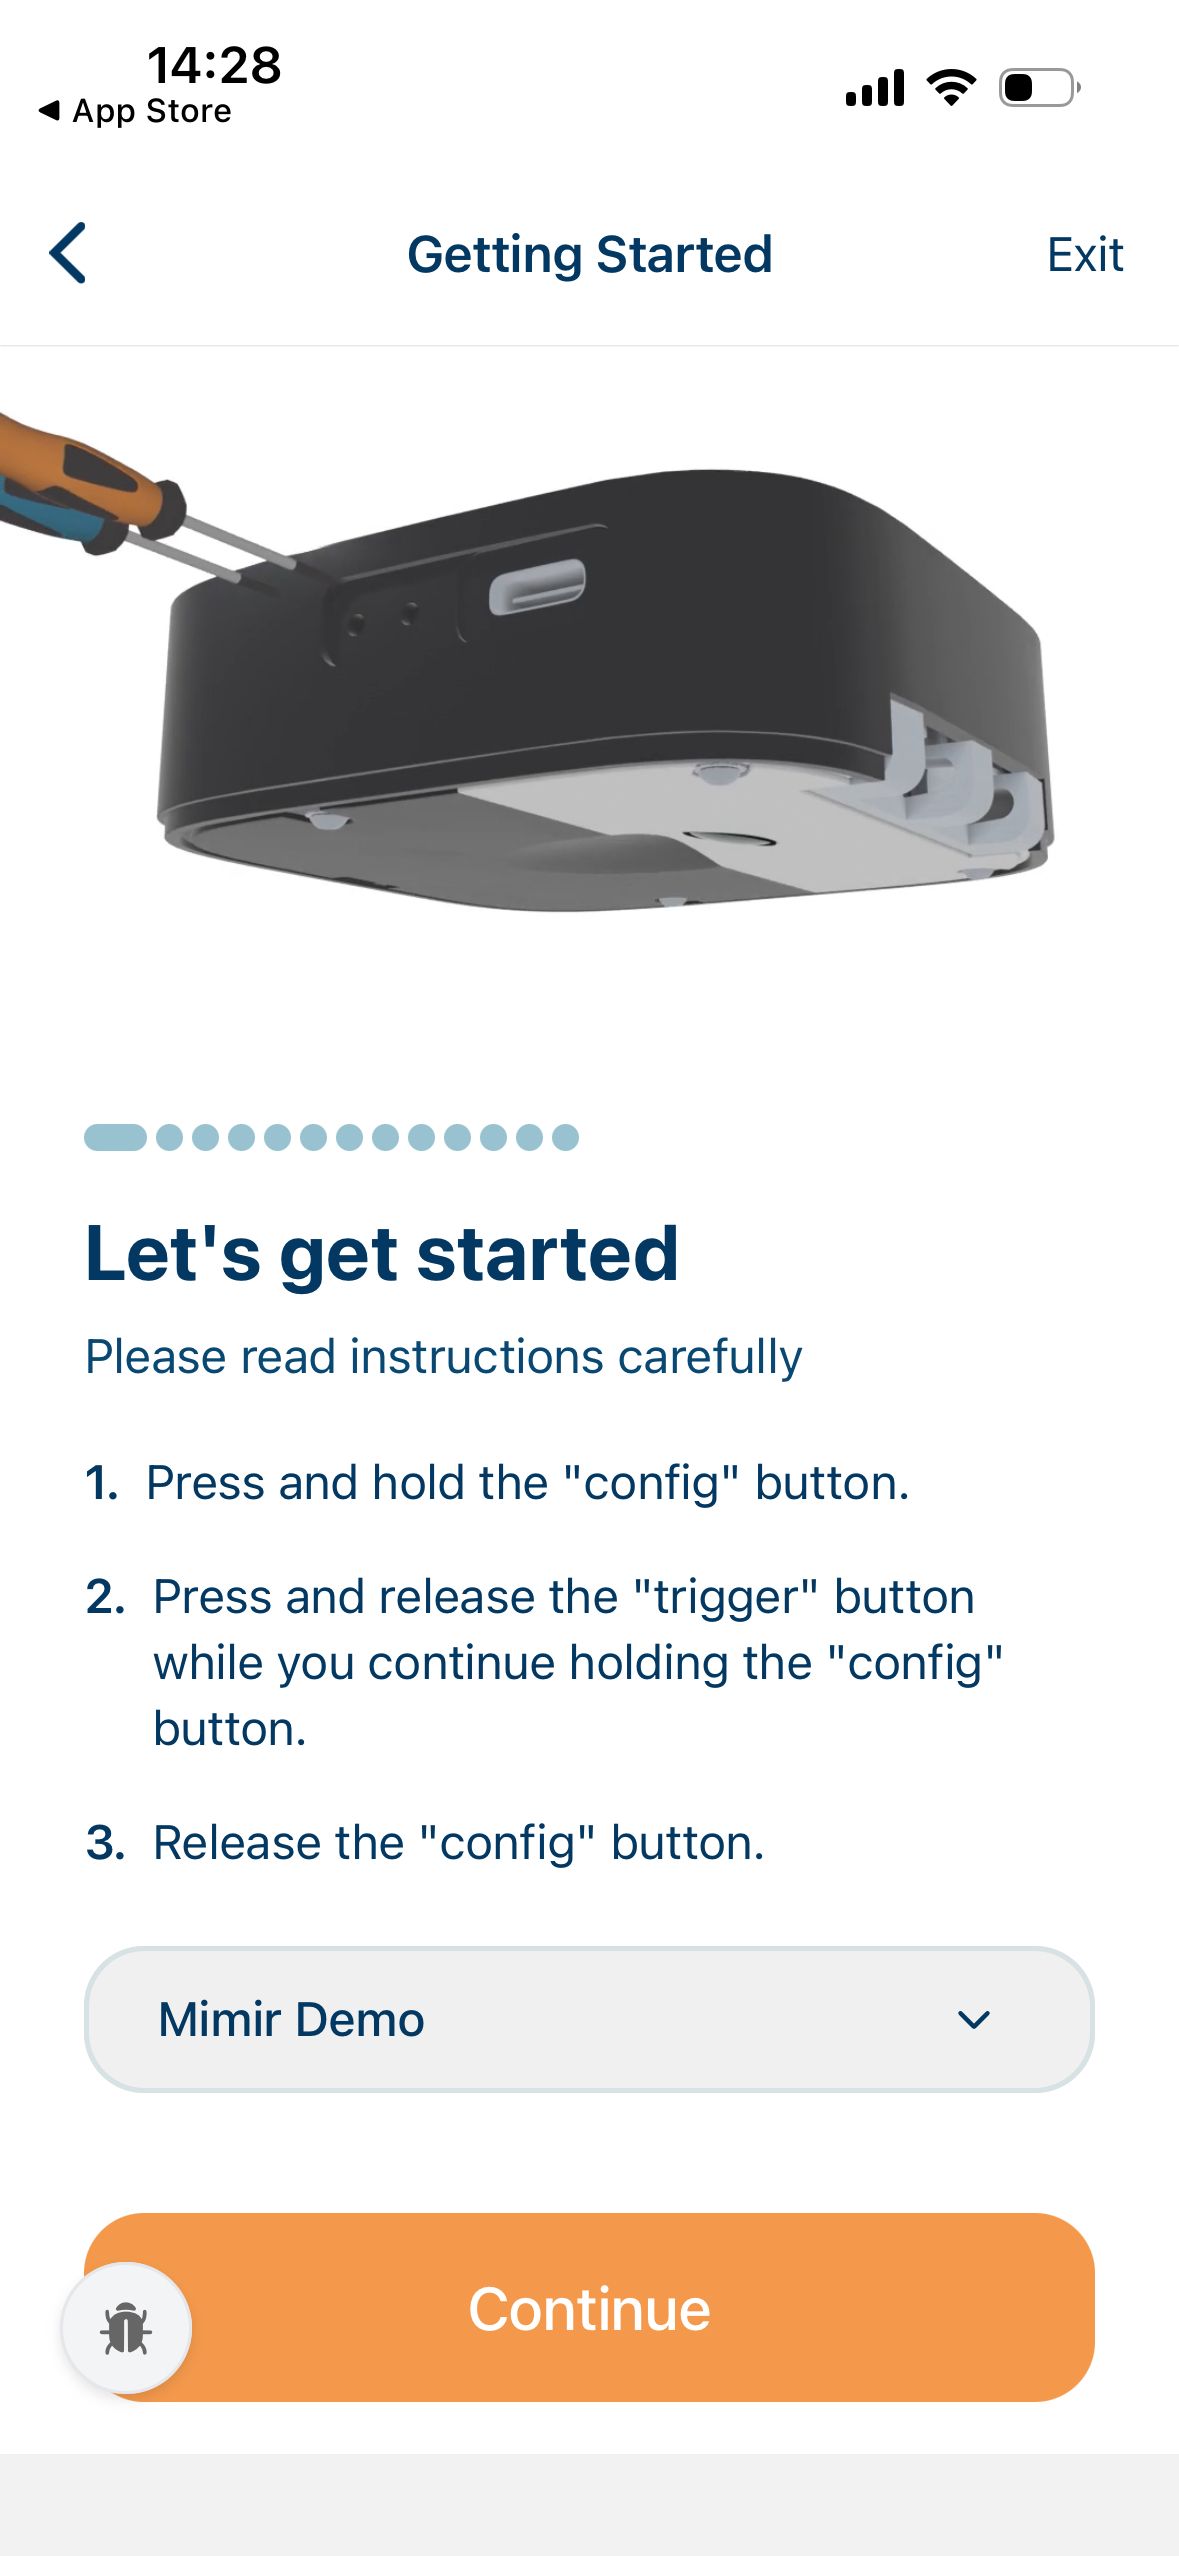
The status light flashes for 2–3 seconds to confirm setup mode is active. The sensor now broadcasts a temporary Wi-Fi network named W-Sensor-XXXX, where XXXX is its serial number. You have about three minutes before it goes back to sleep — if the timer runs out, just wake it again.
Walk through the app
- Log in to the Waltero Setup app and confirm your region.
- Choose Cellular Setup (default) or Wi-Fi Setup depending on how the sensor will connect.
- APN configuration — tap Default unless your carrier has given you specific credentials.
- Pick the organization the sensor belongs to from the dropdown.
- Scan the QR code on the back of the sensor. The header changes to show the serial number when recognized.
- Connect to the sensor’s temporary Wi-Fi network when prompted. Your phone returns to normal Wi-Fi after setup completes.
- Pick the meter type from the list (for example HB X1000, Generic analog meter). Use No Type if nothing matches.
- Take a meter reading — drag the brightness slider until the digits are sharp, then tap Run Reading.
- Confirm the detected reading matches the meter. If a digit is wrong, retake the photo with different brightness or framing.
- Set unit and multiplier — m³, Liters, Gallons, ft³, or kWh. The preview at the top shows how the final reading will look.
When the app shows Device Configured and then Sensor Pairing — Device registered successfully, the sensor has switched back to its production network and registered itself with the Waltero cloud.
Finish the cloud settings
On the Meter Details / Cloud Settings page, set:
- External device ID — a stable identifier you will use to find this sensor in Mimir later (typically the meter ID or installation address).
- Location — drag the map pin to where the sensor is installed and tap the padlock to lock the position.
- Installation photo — take a fresh photo showing the sensor mounted on the meter from a clear angle.
- (Optional) Name and description — a friendly name and free-text notes.
Tap Save. The Setup Complete screen confirms the sensor is live in Mimir.
Step 3 — Verify in Mimir
Open the Mimir dashboard and switch to the organization the sensor was paired into. The new sensor should appear within a minute or two on the Devices page.
| What to check | Where to look | What “good” looks like |
|---|---|---|
| Sensor is online | Devices · status column | Green / Online badge |
| First reading received | Devices · last-seen column | A timestamp within the last few minutes |
| Reading is correct | Device detail · latest reading | Matches the value you confirmed in the app |
| Signal is acceptable | Device detail · connectivity | RSSI ≥ 8, RSRP ≥ −110 dBm |
| Installation photo present | Device detail · gallery | Your install photo from Step 2 |
If anything is missing, press the trigger button once on the sensor to force an immediate sync. The status light goes solid for 1–2 seconds while it connects.
Step 4 — Set a low-battery alarm
While you have the install fresh in mind, configure the pre-built low battery alarm so the team is notified before the cells need replacing.
- Open Management → Alarms.
- Pick the Low battery preset (triggers at 2700 mV — well before total drain).
- Add the email address that should receive the notification.
- Save.
You will get a heads-up email well before the sensor stops reporting, with enough lead time to schedule a battery replacement.
What to expect after install
For the first few hours, the sensor reports more frequently than its production schedule — this is normal and lets you validate the install. After that it falls back to its configured interval (default once per hour).
Things that are normal:
- The dashboard timestamp may lag the first two connections — date and time sync over the next sync cycle.
- The first 2–3 readings may show a Pending badge while the cloud finishes building the device’s history.
- Battery voltage drops sharply in the first hour, then stabilizes.
Things that are not normal:
- No reading after 30 minutes and a trigger-button press — see Common pitfalls below.
- Signal values consistently below RSSI 5 or RSRP −115 dBm — relocate the antenna or fit an external antenna.
- Repeated unable to register messages in the device detail page — usually an APN or SIM issue.
Common pitfalls
- QR scan won’t recognize the label. Clean the QR sticker and reduce glare. Move closer; the scanner works best at about 10 cm.
- Phone won’t join
W-Sensor-XXXX. The setup network only stays up for ~3 minutes. Wake the sensor again (config-hold + trigger) and re-try. - Reading is parsed wrong. The Waltero logo is not aligned to the digits, or the digits are dirty or shadowed. Retake from the Confirm Reading screen — don’t accept a wrong value just to finish.
- Sensor doesn’t connect after install. Try outdoors or attach an external antenna. Cellular coverage varies sharply even within a single room.
- Dashboard never shows the device. Confirm you selected the correct organization in step 2.4. The sensor will not appear under a sibling organization.
Where to go next
This guide gets a single sensor live. For wider deployments, see the API & metering reference for integration paths, and the upcoming Mounts guide for mechanical fitting tips.